In an experiment to find sources of fire starters for campfires this summer, I decided to try using a few of the millions of dryer cloths that were filling up my garbage can.
In a cleared area free from any debris that might catch fire, I began the experiment.
Simple! They just melt! Disintegrate right before your very eyes! And quite quickly, too!
On to the next experiment.....
Thursday, April 5, 2012

Thursday, March 22, 2012
What We Found In Our Backyard....
Just passing through, I'm sure, but nonetheless, beautiful!

This Oriole apparently is making its way from its southern, winter home in Mexico through the western half of the United States up north as far as Canada.
But this is the first time our backyard has hosted such a bright, beautiful bird!
Wednesday, February 15, 2012
Photo Fun!
Lotsa pictures to share of a random nature. We've been having so much fun lately, I haven't kept up with my friends in blog-land!


Thursday, July 7, 2011
The Positive Side of A Hundred Seven Degrees
The southwest desert in the summertime: triple digit temperatures, sidewalk egg-frying competitions, sunburns galore, swimming, (among other things).....
In my limited travels across the United States, I've learned enough about the weather in those areas to know where I like it best. Arizona.
But the hardest part of the summertime here (for me) is when the humidity reaches bath towel stage; otherwise known as the monsoon season. Reminds me of Alabama. Wake up fresh in the morning, showered, hair set, and dry. Then you step outside your front door, unlock the car and get in, and, surprise, you need another shower!
However, there is a positive side to the heat (unbelievably): the humidity is actually good for your skin and lungs. As uncomfortable as it is to be out in (once you've been used to the dry heat), its nice to breathe in moist air. Both in the heat and in the cool, higher humidity means adding lacking moisture to our bodies. That's why it's so important to take water bottles with you everywhere you go. Dehydration is pretty common, but can be avoided by drinking not just juices, but plain ol' water.
And the moisture really treats skin kindly. The big thing in any part of the country is a summertime tan. But as dry and leathery as skin can become, it's really refreshing to be in a high humidity area. You can feel the moisture soak into your skin. It's great! The combination of high (and I mean really high) heat and humidity is what sometimes throws me off when I walk outside and start dripping after three minutes! I have to remind myself that it's good.....really good!
So, there is a good side to high temperatures in the summertime: the humidity rolls in.
In my limited travels across the United States, I've learned enough about the weather in those areas to know where I like it best. Arizona.
But the hardest part of the summertime here (for me) is when the humidity reaches bath towel stage; otherwise known as the monsoon season. Reminds me of Alabama. Wake up fresh in the morning, showered, hair set, and dry. Then you step outside your front door, unlock the car and get in, and, surprise, you need another shower!
However, there is a positive side to the heat (unbelievably): the humidity is actually good for your skin and lungs. As uncomfortable as it is to be out in (once you've been used to the dry heat), its nice to breathe in moist air. Both in the heat and in the cool, higher humidity means adding lacking moisture to our bodies. That's why it's so important to take water bottles with you everywhere you go. Dehydration is pretty common, but can be avoided by drinking not just juices, but plain ol' water.
And the moisture really treats skin kindly. The big thing in any part of the country is a summertime tan. But as dry and leathery as skin can become, it's really refreshing to be in a high humidity area. You can feel the moisture soak into your skin. It's great! The combination of high (and I mean really high) heat and humidity is what sometimes throws me off when I walk outside and start dripping after three minutes! I have to remind myself that it's good.....really good!
So, there is a good side to high temperatures in the summertime: the humidity rolls in.
Thursday, May 26, 2011
Our Unexpected Snowtrip
We really weren't planning on camping in the snow, but after arriving at our chosen spot late in the afternoon, the light drizzle of rain/snow never let up, and we woke up the next morning to at least 6 inches of snow on the ground.
When we got there, we figured at some point it'd all stop. But no! We hurried to set up tents between gusts of wind and dusting of snow, but never got the truck completely unloaded, so half of our gear was covered with snow, too.
We were freezing and everything was wet, including the insides of the tents. When we would tap the inside roof to knock off the snow, we'd get a shower!
It was quite pretty, though.


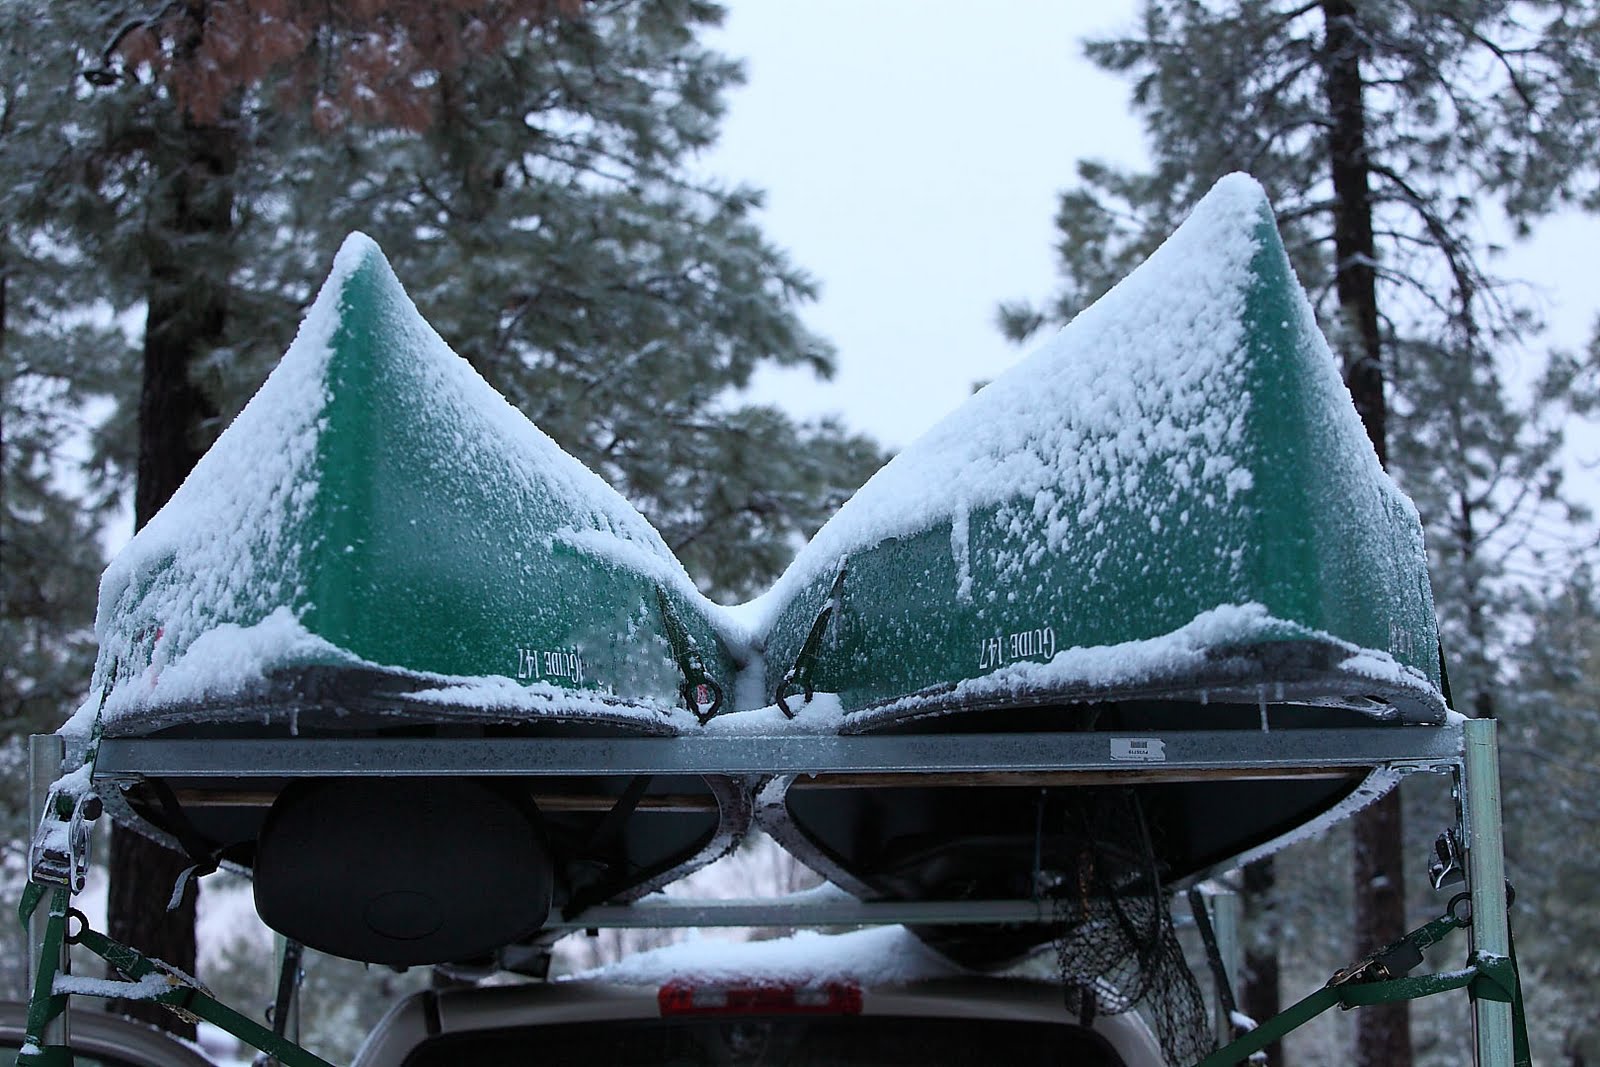
It's not just snow on the tops of the canoes, it's ice! We found out that the temperature than night was 31 degrees! Brrrr!
Soon after this picture was taken, we all packed up and moved to a lower elevation and continued our camping adventure in a dryer spot.
Even though we didn't choose to camp in the snow, I'm glad we did. It's one of those experiences you can say, 'been there, done that!'
Thursday, May 5, 2011
Schooling at Home vs Homeschooling
The term "homeschooling" has taken on different meanings, of late. Up until about ten or fifteen years ago, homeschooling was defined as a parent teaching a child/ren at home using their own resources, creating a well-rounded curriculum of their own choosing, of core subjects including PE, art, and music. It was the parent's responsibility to search out and find the type of materials needed and wanted to teach at home. The parents were to provide everything a child needed to succeed in his/her educational goals or direction, including textbooks, workbooks, projects, supplies for experiments, etc. This required funds from the family budget, either great or small, and time constraints became a thing of the past; meaning there was no "teaching to pass an April standardized test." This opened up endless possibilities and opportunities for the "teacher" to spend as much or little time on a given concept or subject as deemed appropriate --- at least, in Arizona where homeschooled children were and are exempt from standardized testing - probably due to the high level of education parents were providing themselves. The state does not provide any supplemental funding to homeschooling families.
Now, the term "homeschooling" encompasses any type of schooling at home, beit original homeschooling, as described above, part-time schooling where students spend part time learning at home and part time learning at a physical building, online schooling where all of the curriculum is provided (and sometimes computers, too), and "group" homeschooling where parents pool their strong subject abilities, and take turns teaching a "class" made up of their own children. Schools that are state funded require their students to take the standardized tests, both in elementary school and high school.
In the past, we've homeschooled up to seven children at a time at home. But since living out here on the edges of civilization for the past 6+ years, our kids have been in public schools. Many times I've been tempted to bring them home (and probably should have) and resume our homeschool routine because I was really unhappy with the school. But after hearing about the alternative of online high school a few years ago, a few of our kids came home and worked on the computer. For us, it's worked out great.
BUT, I still have great memories of actually homeschooling the kids:
Okay, here's my rant:
Homeschooling is teaching children at home using your own materials that you purchased, after having registered yourself with the state as being a homeschooling family.
Homeschool is NOT taking classes on the computer, or attending state funded classes either online OR in a building.
Therefore, for us, we are NOT homeschooling ---- we are online schooling.
And there you have it!
Now, the term "homeschooling" encompasses any type of schooling at home, beit original homeschooling, as described above, part-time schooling where students spend part time learning at home and part time learning at a physical building, online schooling where all of the curriculum is provided (and sometimes computers, too), and "group" homeschooling where parents pool their strong subject abilities, and take turns teaching a "class" made up of their own children. Schools that are state funded require their students to take the standardized tests, both in elementary school and high school.
In the past, we've homeschooled up to seven children at a time at home. But since living out here on the edges of civilization for the past 6+ years, our kids have been in public schools. Many times I've been tempted to bring them home (and probably should have) and resume our homeschool routine because I was really unhappy with the school. But after hearing about the alternative of online high school a few years ago, a few of our kids came home and worked on the computer. For us, it's worked out great.
BUT, I still have great memories of actually homeschooling the kids:
- using books I bought at a discount store,
- creating my own master copies of the human skeleton,
- buying a slab of clay to use for writing cunieform as part of a history lesson,
- saying the Pledge of Allegiance every morning, along with prayer,
- playing a game on a redesigned gameboard to teach letters and sounds to a preschooler,
- and being done with school just after lunch.
Okay, here's my rant:
Homeschooling is teaching children at home using your own materials that you purchased, after having registered yourself with the state as being a homeschooling family.
Homeschool is NOT taking classes on the computer, or attending state funded classes either online OR in a building.
Therefore, for us, we are NOT homeschooling ---- we are online schooling.
And there you have it!
Tuesday, March 22, 2011
Guess Where We Went Over The Weekend?

Luke Air Force Base Air Show!
Every other year, this event is a must-go-to. All other plans get scrapped to walk what seems like 10 miles around these new and old airplanes, helicopters, and jets, with some of the pilots standing near them to answer questions.
But it's really interesting to see these planes up close.

My personal favorite!
It's a bullet holder on the side of the plane with people walking behind it!

Aren't they cute planes?

The Thunderbirds flew in their formation all over the sky....it was great as an ending to the air show.


Wednesday, February 16, 2011
Renaissance Festival - Arizona
The Renaissance Fair just opened in Arizona this past weekend, and we discovered that, after never having been to one before, it was a worthwhile day spent taking pictures.

Royalty.

Hey, Nunnie, Nunnie is a hilarious act. These two ladies crack one joke after another. They spend their time laughing, and making everyone else laugh on and off the stage!

This (above) is Twig. She's a favorite fairy!

Interesting sight strolling down a main street!

Here is a "knight in shining armor."

One of many shops to buy period cothing.

Jousting was a fun event to watch! Nobody got hurt and one knight won!
Friday, January 21, 2011
New Blog!
After much confusion, frustration, and wasted time trying to make this quilting hobby a part of this blog, I've moved my Sweet Petal Stitchery "page" to its own blog. (there really was a page attached to my blog) Found on blogger by its own name, Sweet Petal Stitchery came about because of my need to be quilting something, and the ease of putting together quilts for babies/toddlers just seemed to follow.
Made mostly for my children and their babies, these baby quilts are also for sale. (currently one is available - others need to be ordered)
I'm hoping to build a supply both of my own designs and already printed designs. You'll want to check in now and then to catch the latest accomplishment! If you visit, leave me a comment, even if its just "hi, I was here!"
Sunday, January 9, 2011
The Power of Music

I love to hear the Mormon Tabernacle Choir sing hymns with their trademark full-bodied sound. Such richness, such majesty, and such grandeur! Quite a moving experience! On Sunday afternoons, we turn the sound up on our Netflix TV screen and listen to them bring into our home a peacefulness, serenity, and happiness. The happiness occasionally turns to giddiness, but for the most part, the mood is just plain happy. I can only imagine how wonderful it would be to sit in the conference center to listen to the Mormon Tabernacle Choir sing the hymns they’re famous for. I’m sure it would be quite overwhelming! (maybe one day….)
I get the maybe-not-so- sought-after calling of Primary Chorister and I really love it. When the children come into our early morning Primary quite solemn (or, in some cases, sleepy), its fun to get them up and moving through singing. They are all so much fun, yet we keep reverence amidst our practicing. I especially love it when the contest of singing loud enough for a hallway listener to hear, produces goosebumps! Such results should be had in all of our Sunday Sacrament meetings. With as many members as there are in our ward, we could actually produce enough sound, with our varied voices, to rival any choir, and an outside passerby would turn to look at our church building and marvel at our musical gusto! I’m waiting for that day! I love it when we go visit our grown children in their Sunday meetings and the congregation really sings! It’s great!
What an opportunity to worship through song each Sunday! There’s a temptation to pick up the rhythm and belt out each song. Music touches our spirits in a way that the spoken word doesn’t, and adds a great deal to our church meetings and our homes.
When our older kids were little, I had them sing in Sacrament meetings to songs by Janice Kapp Perry. They did quite well but hated it like kids sometimes do, but I liked it, it was good for them, and it helped us build memories they all laugh about now. A few of those songs became our family favorites.
Saturday, January 8, 2011
Sweet Petal Stitchery - Baby Zoo Animals - Blue
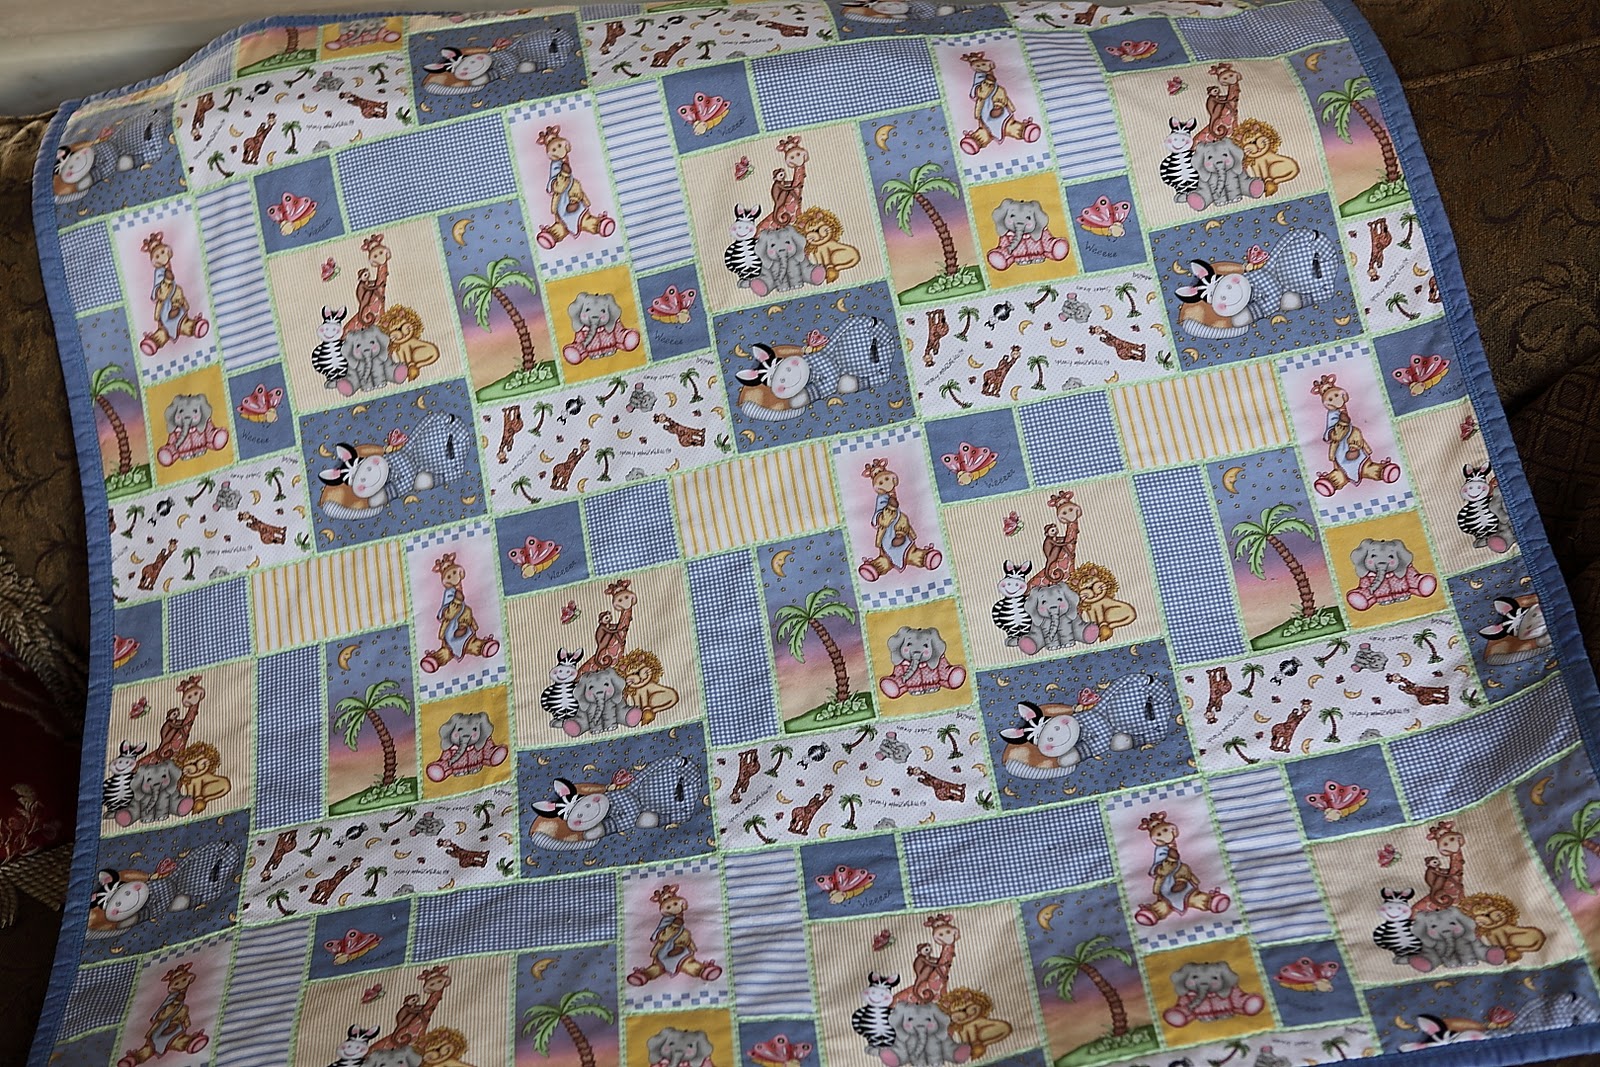
Baby zoo animals adorn the top of this baby quilt, and a matching solid blue fabric is used for the backing. Half-inch batting, and hand stitching throughout make this quilt quite versatile. I made a narrow 5/8" blue binding and stitched it with a secure, decorative machine stitch (which is the only machine stitch used on this quilt)
This baby quilt measures about 43 inches wide, and 42 inches high. Nearly square, it is larger than commercial baby quilts. It can be used as a floor blanket for baby to roll around on or used as a crib quilt.

Cotton/polyester fabric is used for top and bottom fabric, 100% polyester batting, and cotton/polyester thread complete this quilt. Perfect for the washer and dryer.
Every baby quilt I make is completely hand-stitched according to the top fabric pattern and has a machine stitched binding.
Sunday, November 14, 2010
Wheat And Grinder Preferences
The old standby, wheat, dominates our food storage, along with rice and sugar. But using wheat in bread poses a grinding question: do I grind the wheat into a fine flour? Or, do I grind it coarsely to get the benefit of the bran for fiber?
The electric grinder I bought years ago ground the wheat kernels into a nice soft flour, but didn’t have a coarse enough setting to allow me to get that bran I wanted to see in my bread; even the coarsest setting is still a flour. And, its extremely loud, puts a fine powder into the air as it grinds (so I take it outside to grind wheat), and takes a lot of care to clean after each use. But I still like it, and use it when I want a fine wheat flour.
So, I bought another hand-cranked grinder to get the coarse wheat I wanted for breads. It has different settings, but even at it's finest setting, it'still coarse. I love it! It mounts to the kitchen table and grinds perfectly. It takes a little longer to get the amount of wheat I want to store, but it's relative quiet, and I can have someone else help turn the handle for a while.
 Another word about wheat: ideally, wheat should be ground just before using in recipes to get the most nutritious benefit. However, I find it difficult to leave my hand-crank wheat grinder out, mounted on the kitchen table or counter, waiting to be used when I’m ready to bake bread. Even leaving the electric grinder out (to take outside) wouldn't be practical either. So I coarsely grind several cups of wheat with the hand-crank grinder and store it in an air-tight canister to be used in pancakes, bread, and anything else I choose, and then its put away for a while. I do the same thing with the electric grinder: I grind lots at once and store it for use later.
My thoughts are that eating wheat, even if its ground weeks earlier, is still good for you. It’s better than nothing. The impression is often given that if one doesn't grind their wheat just prior to baking, you're either not a very good cook, or somehow you don't quite meet up to the ideal standard. However, I believe that if you can sprout your 15+-year-old wheat, then it's still good and you can grind it, store it, and use it whenever you need it. Otherwise, what's the point of storing so much wheat and using it a little at a time?
A personal preference: Between red wheat and white wheat, I like red wheat for it's stronger flavor in pancakes and some breads. I also like red wheat for a hot cereal cooked in a crock pot overnight. White wheat (finely ground) is good for a hint of wheat flavor in some breads.
The electric grinder I bought years ago ground the wheat kernels into a nice soft flour, but didn’t have a coarse enough setting to allow me to get that bran I wanted to see in my bread; even the coarsest setting is still a flour. And, its extremely loud, puts a fine powder into the air as it grinds (so I take it outside to grind wheat), and takes a lot of care to clean after each use. But I still like it, and use it when I want a fine wheat flour.
So, I bought another hand-cranked grinder to get the coarse wheat I wanted for breads. It has different settings, but even at it's finest setting, it'still coarse. I love it! It mounts to the kitchen table and grinds perfectly. It takes a little longer to get the amount of wheat I want to store, but it's relative quiet, and I can have someone else help turn the handle for a while.
My thoughts are that eating wheat, even if its ground weeks earlier, is still good for you. It’s better than nothing. The impression is often given that if one doesn't grind their wheat just prior to baking, you're either not a very good cook, or somehow you don't quite meet up to the ideal standard. However, I believe that if you can sprout your 15+-year-old wheat, then it's still good and you can grind it, store it, and use it whenever you need it. Otherwise, what's the point of storing so much wheat and using it a little at a time?
A personal preference: Between red wheat and white wheat, I like red wheat for it's stronger flavor in pancakes and some breads. I also like red wheat for a hot cereal cooked in a crock pot overnight. White wheat (finely ground) is good for a hint of wheat flavor in some breads.
Tuesday, November 9, 2010
Year's Supply Review - Freeze-dried versus Dehydrated
(What I’ve learned…)
When deciding what items fit into your food storage, there are several choices: canned, frozen, freeze dried and dehydrated, among others. When looking for something dried, there are these options: dehydrated and freeze-dried.
Dehydrated foods are foods that have had the moisture removed (as much as possible) and stored in air-tight containers. Freeze dried foods are flash frozen, then dried. How is it made? “To create freeze-dried food, the item is first flash frozen, then a low-level heat is applied inside a vacuum chamber. This process melts the ice crystals without changing the cell structure of the food. Finally, the food is packed for long-term storage. This process retains much of the color, texture, shape, flavor, and nutrition.” (Emergency Essentials, November 2010 catalog, pg. 5)
So which is better? The answer depends on your taste buds, and your budget. Dehydrated foods, whether fruits or vegetables, still have some moisture in them, and therefore, are sometimes a bit more rubbery. And there is some color loss in dehydrated food. Freeze dried foods, are more crunchy; but a kind of easy-on-your-teeth, crunchy. Both work well in soups and stews, but used as side dishes, you’d have to experiment with your level of acceptance. Some dehydrated vegetables work only in soup/stew dishes, while others are passable enough to stand on their own as side dishes. And the cost of freeze-dried food items is usually more than dehydrated. But then again, you’d need to experiment with your own taste, and product usefulness to see what works for your family.
Granted, nothing is better than fresh, but either freeze-dried or dehydrated are good additions to a year’s supply of food storage.
I’d be curious to know if anyone has a favorite freeze-dried food, or a favorite dehydrated food….
My favorites are freeze-dried peaches and strawberries (expensive, but really good!).
Dehydrated apples are great for car trips as a snack. Tomatoes (and other vegetables) are great for soup.
My favorites are freeze-dried peaches and strawberries (expensive, but really good!).
Dehydrated apples are great for car trips as a snack. Tomatoes (and other vegetables) are great for soup.
Monday, November 8, 2010
Year’s Supply Review – Powdered Milk
We all know that for what seems like hundreds of years we’ve been counseled to get our year’s supply of food and supplies. But a complete year’s supply of food can be hard to compile and store, and then compile and store all of the supplies that are required.
Our experience has been that even though storage space is an issue, having the extra is well worth it. We’ve found ourselves out of butter or milk, and resorted to using our reserves in powdered form. And there have been times when we’ve run out of potatoes, and used our canned potatoes, or we’ve run out of grape jelly and used our stored homemade jellies.
Most recently, we’ve used our powdered milk. Over the years I’ve tried powdered milk products, judging their taste and bake-ability, and have found that one brand, so far, has topped the others hands down. As far as using powdered milk in baking bread, any brand or kind works well. But drinking powdered milk is a whole different story. Taste is everything!
 Provident Pantry’s Instant Nonfat Dry Milk has the taste a powdered milk should have (because it's supposed to taste like regular milk), and is worth its weight in gold. It mixes quite well; better than regular powdered milk, which can stay lumpy for a while. This milk mixes smoothly with little lumps that dissolve quickly. I usually add the water to the powder in a pitcher and whisk it to blend quickly, then use a long spoon or knife to loosen any powder at the bottom edge of the pitcher. Even though whisking produces lots of foam, refrigerating the milk (or adding ice cubes to cool it for immediate use) will break the tiny bubbles and make it smooth like regular two-percent, store-bought milk.
If you need to add powdered milk to your year’s supply of food storage, and know that at some point you might need to drink it, get the milk that you know will taste as close to store-bought as you can get (sounds like a commercial!). Because you’ll be glad you have it when you’re dollar-stretched or have run out of regular milk. And hopefully you’re family will enjoy the taste as well.
Our experience has been that even though storage space is an issue, having the extra is well worth it. We’ve found ourselves out of butter or milk, and resorted to using our reserves in powdered form. And there have been times when we’ve run out of potatoes, and used our canned potatoes, or we’ve run out of grape jelly and used our stored homemade jellies.
Most recently, we’ve used our powdered milk. Over the years I’ve tried powdered milk products, judging their taste and bake-ability, and have found that one brand, so far, has topped the others hands down. As far as using powdered milk in baking bread, any brand or kind works well. But drinking powdered milk is a whole different story. Taste is everything!
Provident Pantry’s Instant Nonfat Dry Milk has the taste a powdered milk should have (because it's supposed to taste like regular milk), and is worth its weight in gold. It mixes quite well; better than regular powdered milk, which can stay lumpy for a while. This milk mixes smoothly with little lumps that dissolve quickly. I usually add the water to the powder in a pitcher and whisk it to blend quickly, then use a long spoon or knife to loosen any powder at the bottom edge of the pitcher. Even though whisking produces lots of foam, refrigerating the milk (or adding ice cubes to cool it for immediate use) will break the tiny bubbles and make it smooth like regular two-percent, store-bought milk.When we first bought Provident Pantry’s brand milk, I was so impressed with the ease of mixture and especially its taste, I wanted to tell the whole world how good it was (and passed my enthusiasm on to some ladies at church, and wrote a post about it). I even invited some ladies to come by my house and taste it.
I use powdered milk when we’ve run out of store-bought milk, and I use it in bread-making. Our picky teenagers sometimes turn their noses up at the thought of drinking any kind of powdered milk, but they’ll drink it, which is a good thing.
Wednesday, October 27, 2010
Eliza Shares a Recipe
Eliza found some easy cookies to make, and she was so excited to share them, that I thought I'd post her success. The recipe came out of the Hershey's Chocolate Cookbook, and is quite workable for a young baker, especially because it's all done in the microwave.
Chocolate Crackles
10 T. butter
6 T cocoa
1 c. sugar
2 tsp. baking powder
1/2 tsp salt
2 eggs
1 tsp. vanilla
2 c. flour
1/2 c. nuts, chopped


Chocolate Crackles
10 T. butter
6 T cocoa
1 c. sugar
2 tsp. baking powder
1/2 tsp salt
2 eggs
1 tsp. vanilla
2 c. flour
1/2 c. nuts, chopped
powdered sugar

Microwave butter in medium bowl for 45-60 seconds or until melted. Add cocoa; blend well. Beat in sugar, baking powder, salt, eggs and vanilla. Stir in flour and nuts. Refrigerate at least 8 hours or until firm.
Shape into 1 inch balls; roll in powdered sugar. Place 8 cookie balls on a plate and microwave at 50% power for 1-1/2 to 2 minutes or until surface is dry but cookies are soft when touched. Cool, and repeat with remaining dough. Optional: sprinkle with additional powdered sugar after they come out of the microwave.
Note: After mixing, Eliza put the dough in the freezer for about 1 hour. She used chopped peanuts in the mix. Also, the dough is the consistency of playdough, and therefore, produces a cake-like cookie.

Pretty good, for a young teen!
Saturday, September 18, 2010
Peaches!!!!!
Time for Peaches!

I love this time of year because of all the fruit we get to preserve: apples, pears, and peaches!
It's also the time chocolate can be ordered, too. (but that's another story!)
Here's how I preserved our peaches: frozen and dehydrated.
With our box of peaches,

I put about 5 or 6 in a pot of boiling water for a few minutes to loosen the skins.

Then I put the peaches in ice cold water to stop them from cooking all the way through.
I just want to heat the skins enough to separate them from the pulp on the inside.
The skins slip right off! So Easy!
The skins slip right off! So Easy!

Then I cut them in half, take out the big seed, and slice them for dehydrating and freezing.
(Dehydrating: 1/4 - 1/2 inch thick, for about 8 - 10 hours, or till crispy)
(Freezing: 1/2 - 3/4 inch thick, for about 6 hours, or until nearly frozen)
The slices then go either on the dehydrater trays to dry, or on a jelly roll pan for freezing.

After they were nearly frozen through, I took a large pancake turner (metal) and scraped them from the pan and put them in a ziploc bag for further freezing.

I love the color of the water after scalding a few batches of peaches.
Rich rose color! (although this picture doesn't do it justice - a bit blurry)
Rich rose color! (although this picture doesn't do it justice - a bit blurry)

These are the frozen peaches. Turned out great!

And these are the dehydrated peaches.
Quite thin, but still pretty good eating.
This was the first batch - paper thin.
(The other batches were thicker)
But whether thick or thin, they're still good eating!
(The other batches were thicker)
But whether thick or thin, they're still good eating!
Saturday, May 15, 2010
Braided Bread! Yum!
This recipe turned out great! I used a regular bread recipe, cut into thirds after it's first rising, and made three different things out of it: This braid, some nut-filled crescent rolls, and a loaf of raisin bread. The crescent rolls disappeared in a blink, and the raisin bread needed more baking, but all turned out great!
 The hard part is keeping hands off of it till dinner!
Monday, December 7, 2009
A Christmas Tradition: Mincemeat Cookies
A tell-tale sign it’s Christmas at our house is the making of Mincemeat cookies. I grew up with these Christmas cookies, but not everyone (outside family) likes them. Actually, mincemeat sounds rather gross to me, but made into cookies they disappear quickly.
Mincemeat is a mixture of minced apples, raisins, spices, currants, and sometimes minced meat (which, if it is in the jar, you can’t taste it), that is usually made into pies. Never tasted mincemeat pie (and don’t care to, thank you!). It is NOT like fruit cake. It is a cake-like spice cookie with little chunks of apples and raisins, and a little sweetness. Mincemeat is only available during the Christmas season, and one jar makes two batches. Recipe is on the jar.
Try it! You might like it!
Mincemeat Cookies
1 c. shortening
1-1/2 cups granulated sugar
3 eggs
3 cups unsifted all purpose flour
1 tsp. baking soda
½ tsp. salt
1-1/3 cups (1/2 of a 28 oz. jar) None Such Mince Meat
Official directions:
Preheat oven to 375F. In large mixing bowl, cream together shortening and sugar. Add eggs, beating until smooth. Combine dry ingredients; gradually add to creamed mixture. Mix well. Stir in mincemeat. Drop by rounded teaspoonfuls 2 inches apart onto greased baking sheets. Bake 8-10 minutes or until lightly browned and no longer glossy in center. Makes about 6-1/2 dozen.
Note: In my usual style, I mix all the dry ingredients first, cut in the shortening, and then mix in the eggs and mincemeat. They turn out the same as following the official directions! (watch over-browning around the edges)
Another Note: there are two types of mincemeat: apples and raisins, and brandy and rum. There's a little red oval label on the lower right side of the regular label that tells you which is which. We always buy the apples and raisins type.
Mincemeat is a mixture of minced apples, raisins, spices, currants, and sometimes minced meat (which, if it is in the jar, you can’t taste it), that is usually made into pies. Never tasted mincemeat pie (and don’t care to, thank you!). It is NOT like fruit cake. It is a cake-like spice cookie with little chunks of apples and raisins, and a little sweetness. Mincemeat is only available during the Christmas season, and one jar makes two batches. Recipe is on the jar.
Try it! You might like it!
Mincemeat Cookies
1 c. shortening
1-1/2 cups granulated sugar
3 eggs
3 cups unsifted all purpose flour
1 tsp. baking soda
½ tsp. salt
1-1/3 cups (1/2 of a 28 oz. jar) None Such Mince Meat
Official directions:
Preheat oven to 375F. In large mixing bowl, cream together shortening and sugar. Add eggs, beating until smooth. Combine dry ingredients; gradually add to creamed mixture. Mix well. Stir in mincemeat. Drop by rounded teaspoonfuls 2 inches apart onto greased baking sheets. Bake 8-10 minutes or until lightly browned and no longer glossy in center. Makes about 6-1/2 dozen.
Note: In my usual style, I mix all the dry ingredients first, cut in the shortening, and then mix in the eggs and mincemeat. They turn out the same as following the official directions! (watch over-browning around the edges)
Another Note: there are two types of mincemeat: apples and raisins, and brandy and rum. There's a little red oval label on the lower right side of the regular label that tells you which is which. We always buy the apples and raisins type.
Thursday, August 13, 2009
Pomegranate Jelly!
This recipe was just as fast as the Spiced Apple Jelly. An hour at most, from start to finish, and you're done!
GATHER YOUR SUPPLIES
large bowl for measured sugar
wooden spoon for stirring
8 qt. stock pot
1/2 pint preserving jars with lids and bands
pomegranate juice
powdered pectin
granulated sugar
butter, optional
boiling water bath or steamer canner
Recipe:
3-1/2 cups prepared or bottled pomegranate juice
1 box fruit pectin
1/2 tsp. butter, optional
5 cups granulated sugar
7 (8oz.) half pint glass preserving jars
Begin:
Prepare canner and set aside. Heat jars (I put them on a cookie sheet in a low heat oven - 200 degrees). Soften lids by putting them in hot water till ready for use.
Measure sugar in a large bowl; set aside.
In an 8 qt. stock pot, pour pomegranate juice. Gradually stir in pectin. Add up to 1/2 tsp. butter to reduce foaming, if desired (I did. See it?).

Over high heat, bring to a full rolling boil, stirring constantly.
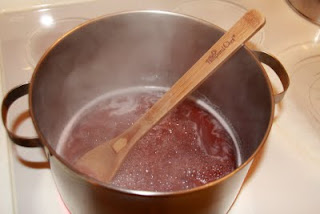
Add entire measure of sugar and dissolve thoroughly. Bring mixture to a full boil again.
Boil hard for 1 minute, stirring constantly.

Remove from heat; skim foam if necessary. I use a napkin to lightly skim the surface of liquid to gather foam to the sides and lift out any foam.
Ladle into hot jars leaving 1/4 inch head space. Wipe rim, set lid on top, twist on band till fintertip tight.
Process in canner 10 minutes.

Remove jars and cool.
This and other home canning recipes can be found at the Ball Canning website.
Tuesday, August 11, 2009
Spiced Apple Jelly
Fast and simple jelly made from apple juice - a family favorite.

Delicious! I love the amber color with little specs of cloves floating around in it.
 I love my steamer canner! It's great for making jams, jellies, and bottling fruit, and it's so easy to use. I bought it about 20 years ago, and though it shows wear, still works great. Holds 7 quarts or pints.

4 cups bottled or canned apple juice
1 package powdered fruit pectin
5-1/2 cups sugar
1/4 teaspoon cinnamon
1/2 teaspoon ground cloves
In a small stock pot, combine juice, spices and pectin; bring to a full boil. Stir in sugar; return to boil; boil for 2 minutes, stirring constantly. Remove from heat; skim off foam.
Ladel into hot jars to within 1/2 inch of jar top. Wipe jar rim, seal, twist on lids. Process in water bath canner 5 minutes, or process in fruit steamer canner 5 minutes. Remove and cool; tighten lids. Best if left to set 12 hours before opening.
Delicious! I love the amber color with little specs of cloves floating around in it.
I love my steamer canner! It's great for making jams, jellies, and bottling fruit, and it's so easy to use. I bought it about 20 years ago, and though it shows wear, still works great. Holds 7 quarts or pints.Next jelly making venture will be with pomegranate juice!
Subscribe to:
Posts (Atom)